Friday 28 February 2014

One Pan Fish Cake


Before I start I'd just like to point out that the name of this recipe is a bit of misnomer - the dish is finished and served in one pan but does use two more during the preparation so maybe it should be called Three Pan Fish Cake but that's not quite so catchy! Don't worry though - it's not difficult and it's totally delicious and well worth the effort. 

I've been making this recipe for ages - it's from a Gary Rhodes cookbook I've had for years. He calls it Whole Round Fish Cake with Melting Swiss Cheese. I don't use Swiss Cheese so I could have called it Whole Round Fish Cake with Cheddar but in our house we call it One Pan Fish Cake and I think that's just fine.

I like to make it with Salmon and Smoked Haddock but most thick fleshy fish would be great in this. I got some fabulously fresh and good quality local fish from the Brown Bag Seafood Company whose van was parked up at one of the local farm shops and which made this dish extra special. If it needs to be made in a hurry even a couple of tins of tuna might work but I'd personally go for fresh fish every time. When it's ready just plonk the pan in the middle of the table with some good crusty bread and let everyone tuck in!


One Pan Fish Cake Recipe


Notes: According to the recipe this should serve 4-6 but it's so delicious in our house it only stretches to 3! I've used dried tarragon because I think it tastes as good as fresh in this but if you have fresh then use it! If I've just made fresh mashed potato and it's still hot I sometimes miss out stage 7 below but be careful - you don't want cold fish cake. Don't worry too much about being precise with the measures detailed below - a bit more or a bit less of anything is okay.


Ingredients:

50g butter
1 small onion, finely chopped
350g salmon fillet
350g smoked haddock fillet
300ml white wine
bunch of spring onions, shredded
675g mashed potatoes
1tbsp chopped fresh parsley
1tsp dried tarragon 
1tbsp olive oil
50-100g grated Cheddar cheese
Salt and Pepper

Method:

Preheat the oven to 200°C / 400°F / Gas Mark 4. Have some mashed potato you made earlier at the ready.

1. Place the fish in a lightly buttered ovenproof dish, season with salt and pepper, sprinkle with the onion and pour over the white wine.

The fish before it goes into the oven to cook

2. Cover with foil and place in the oven - bake for around 20 minutes until the fish is cooked.

3. Turn the oven down to 180°C / 350°F / Gas Mark 4 and remove the fish from the dish before pouring the wine, onion and fish residue into a small saucepan, bring it to the boil and reduce it by half to three-quarters.

4. Melt a knob of the butter in a non-stick ovenproof (very important!) frying pan and add the spring onions. Cook for a few minutes until softened then remove them and leave them to cool.


5. Break the salmon and haddock flesh into small chunks - removing any bones - and mix half with the  mashed potato. Add the spring onions, reduced wine mixture and herbs. Season well with salt and pepper.

6. Melt the remaining butter in  the ovenproof pan the spring onions were fried in and spoon in the fish cake mixture. Pan-fry over a medium heat for 8-10 minutes until the base becomes golden brown.

7. Cover with foil and place in the oven for 15 minutes until thoroughly warmed through. 

8. Remove the foil and cover the top with the remaining chunks of fish then sprinkle with the grated cheese. Place under a preheated grill to melt the cheese.


Ready just to be finished under the grill

9. Serve.

Thursday 27 February 2014

Dare I say 'Healthy' Banana and Walnut Cake?

Dare I say healthy? I should probably say this quick recipe is for a much healthier version of a traditional cake - it uses sunflower oil in place of butter so has less saturated fat, contains approximately one third less sugar than most similar cakes and is packed with the all goodness of bananas. However, it does still contain white flour so it's not the best thing to eat while on a low carb diet and the oil will add calories but overall I do feel a lot less guilty when tucking in to a large slice of this yummy cake! 

 It's also a tasty way of using up those bananas that have been sitting in the fruit bowl a bit too long and are way past their best but that you don't have the heart to throw out! And it's really easy to make - what could be better?

A less guilty slice of Banana and Walnut Cake

Notes: Other nuts or dried fruit (or a bit of both) can be used in place of walnuts. I use sunflower oil and haven't tried using any other type of oil but I guess any mild-flavoured oil could be used in it's place. The original recipe called for light muscovado sugar but I use caster sugar which works well. Finally, I use semi-skimmed milk in the recipe but if you want to cut down on fat even further skimmed could be used. 

Ingredients:

2 large ripe bananas
250g self-raising flour
1 tsp baking powder
4 tbsp caster sugar
1/2 tsp cinnamon
6 tbsp sunflower oil
6 tbsp semi-skimmed milk
2 eggs
100g chopped walnuts

Method:

1. Preheat oven to 180°C / Gas Mark 4. Brush a loaf tin with a little oil - I use one 12cm x 24cm.

2. Peel the bananas and mash with a fork.

3. Sift the flour, baking powder and cinnamon into a bowl and stir in the sugar.

4. Whisk together the oil, milk, eggs and add to the flour mixture. Add the mashed banana and chopped walnuts then add the mixture to the prepared tin.

5. Bake for 45 minutes or until the cake is well risen and golden and a skewer inserted in the centre comes out clean.

6. Leave it to cool for 15 minutes then turn out onto a wire rack to cook completely.

7. Slice and enjoy!

If you do happen to have any left over just wrap it tightly in cling film to keep it fresh and eat within 2 days for best results.

This quantity fits well into a loaf tin 12cm x 24cm


The cake should be well risen and golden after approx 45 mins

The original recipe that inspired me is:


Tuesday 25 February 2014

Rosemary and Sea Salt Focaccia completes a lazy Sunday brunch

On a Sunday I like nothing better than tucking into a traditional roast beef lunch but we've had a few really busy weekends lately and this Sunday I was ready for a chill-out day - maybe a nice walk (depending on the weather) and the opportunity to catch up on a few episodes of my favourite TV programmes. I had therefore decided that lunch would be more of a casual affair with as little fuss as possible and had an idea to do a leisurely 'help yourself' type of meal that required no cooking - my own twist on Greek mezze or Italian antipasti. 

I went in search of some suitable ingredients on Saturday and found some lovely cheeses and cold meats, some olives, roasted peppers and artichoke hearts in a jar and a nice ham, chicken and stuffing pie from a local farm shop. All delicious and ready to serve - perfect! 

It was only on Sunday morning that I realised I had forgotten to buy bread, which for me is one of the must-haves on a meal like this!  I could have easily popped down the road to the supermarket to pick up a french stick or a bloomer but this was supposed to be a nice relaxing day and I really couldn't face the supermarket.

So I searched the internet for a nice bread recipe and I found one on the BBC Good Food site for Rosemary and Sea Salt Focaccia that sounded good and didn't seem like too much work - especially as I could make the dough in my bread machine. I had some sprigs of Rosemary in the bottom of the fridge that had seen better days but decided they'd be fine to add to bread.

Out came my trusty bread machine and I popped the dough ingredients in and put it on the 'Dough' setting - 1hr 30mins came up on the display. Fantastic - we had enough time for a walk!

So out we went and had a lovely walk along the banks of the Tyne in Hexham. It was a bit wild and woolly in Northumberland on Sunday and we got a tad wet but it was enjoyable nonetheless.


Tyne Green, Hexham

The banks of the Tyne

A short walk through the trees
When we got home the dough was just about ready. How good was that? I'd been out enjoying some fresh air while my bread machine had been doing all the hard work for me! I just needed to shape it, let it have one final rise, top it with oil, rosemary and salt and then bake it in the oven.

15 minutes later and it was ready - all puffed up and golden and the results were excellent - the bread was really moreish and was the perfect accompaniment to our lazy Sunday brunch!


Sea salt, Rosemary and lots of Olive Oil make this bread tasty and moist
After 15 minutes baking the bread was well risen and golden
A lovely spongy centre
Mmm...tasty!
The recipe for Rosemary and Sea Salt Focaccia is shown below. If you haven't got a bread machine the dough can of course be made by hand. I've put both methods in for good measure.

Notes: Thyme would be a good substitute for the rosemary and sea salt isn't essential - a good sprinkling of normal table salt would work just as well.


Ingredients
For the dough:
For the topping:


Method
To make the dough by hand:
1. Put the flour, yeast, sugar and salt in a large bowl. Mix the olive oil with the warm water and pour it on to the flour mixture. Stir with a wooden spoon and then bring the mixture together with your hands to form a rough ball.


2. Turn the dough out on to a lightly floured surface and knead for 5 minutes to make a smooth, pliable and fairly soft dough. Transfer the dough to a lightly oiled bowl, cover loosely with oiled cling film and leave to rise for about an hour in a warm place until it has doubled in size.

3. Lightly oil a large baking tray measuring about 36cm x 25cm/14in x 10in.

4. Carry on from point 5 below.

To make the dough by machine:
1. Put the warm water, olive oil, salt and sugar into the pan of the bread machine. Add the flour and yeast on top without stirring.

2. Set the machine to the dough setting and start the machine. 

3. Lightly oil a large baking tray measuring about 36cm x 25cm/14in x 10in.

4. Once the cycle has completed, carry on from point 5 below. 

For both methods:
5. Turn the dough out on to a floured surface and knock it back with your knuckles. Press the dough into a rough rectangle, about the size of the baking tray, then carefully place it on the baking tray and ease it out towards the edges. Don’t worry too much about how it looks – it’s meant to be rustic.
Cover loosely with oiled cling film and leave in a warm place for a further 30 minutes to prove.
6. Preheat the oven to 220C/425F/Gas 7.

7. After 30 minutes, the focaccia should look puffed up and spongy. Use your index finger to poke dimples all over the dough right through to the bottom of the tray.

8. To make the topping, drizzle the focaccia with the three tablespoons of olive oil, allowing it to seep into the dimply holes. Sprinkle with the sea salt, black pepper and chopped rosemary. Finish by poking the twiggy sprigs of rosemary randomly into the dough.

9. Bake in the centre of the oven for about 15–20 minutes or until risen and deep golden brown. Serve warm.


Sunday 23 February 2014

An evening of great British food and rude beer mats

For our Anniversary meal this year my hubby and I paid a visit to one of our favourite haunts, The Angel Inn, in the nearby village of Corbridge. The Angel is an old Inn dating back to 1752 that serves fabulous locally sourced food and ales and also offers accommodation for those who want to spend a bit of time in this gorgeous Northumbrian village. They even have their own flock of sheep that graze nearby which are eventually served as spring lamb on the menu - fancy that!

Although a restaurant is available we wanted something a bit more casual and cosy so chose to dine in the bar which has a lovely rustic feel to it with scrubbed pine tables dotted about. We were handed a bar menu along with a specials menu that tempted us with a delicious and varied selection. There was everything you'd expect from a great British bar menu including steak, fish and chips, lamb casserole with dumplings and beef and ale pie with prices ranging from around £11.00 to £22.00. The children's selection also caught my eye - it offered some great options for kids such as chicken curry and rice and sausage and mash. There was not a chicken nugget in sight for once!

We had ordered our food and sat back to enjoy our drinks when my hubby noticed the beer mats on the table. They were promoting Fentiman's drinks and had an odd shaped hole cut out of them - I'll let the photos below do the talking for me - we thought they were hilarous!
We were puzzled by the odd-shaped hole cut out of the beer mat


The purpose of the hole soon became clear - ha ha!
And here's another!


Our starters arrived really quickly and we couldn't believe the size of the portions. I'd ordered a duo of Ham Hock Terrine and Pork Terrine which was served with onion marmalade, english mustard and some crunchy croutons. My hubby had a warm salad of smoked bacon, black pudding, croutons and quails eggs. Both starters were really plentiful and would easily serve as a light main course themselves. They were also really fresh and totally delicious. My terrine tasted like homemade and I'm sure it was.


Warm salad of smoked bacon and black pudding with quails eggs
My duo of ham hock and pork terrines tasted like homemade
And I'm sure they were!
Our mains arrived shortly after and they too were fairly large - mine in particular was really hearty - Confit Shoulder of Pork with Celeriac Mash, Buttered Spring Cabbage and Apple and Rhubarb Compote. My husband's also looked delicious - he'd gone for the Pan Seared Lambs Liver, Smoked Bacon, Shallot and Red Wine Sauce and served with Champ Mash. 

We really enjoyed both dishes - the flavour combinations in my dish were perfect - the celeriac mash had just a hit of celeriac that did not overpower the creamy taste of the mash and the pork was so tender it was falling apart on my fork. Unfortunately I couldn't quite manage to finish mine such was the size of the portion.


Confit of Pork - a hearty and deliciously tasty choice

Pan seared lambs liver - did this come from the restaurant's own flock of sheep I wonder?

Alas, full to the brim we both declined the homemade deserts but had I been able to fit one in, it would have been a difficult decision between the Sticky Toffee Pudding with Butterscotch Sauce and the Treacle Tart, which the menu suggested was served with Newcastle Brown Ale Fudge Ice Cream!

Overall we had a really enjoyable night of food and laughter at The Angel Inn. In my opinion, if you're in the area and looking for a place that serves good quality, local and plentiful pub fare and a wide choice of local beers then don't go past The Angel. 

The word on the street is that the management are soon opening a Fish and Chip Shop in Corbridge - I'll definitely be trying that! 

Saturday 22 February 2014

The Pasty has landed!


After a few days wait since I placed the order I was really excited to take delivery of a package of Ivor Dewdney's pasties yesterday. These are the pasties from my hubby's childhood and there's a back story to this in my earlier blog Pasties by Post.

The pasties arrived by courier, still frozen, and neatly packaged in an insulated carton and were put straight into our freezer to keep them fresh. When my impatient husband couldn't wait any longer we took two out and popped them in the oven. They came with cooking instructions so we were careful to follow them to make sure we got the best results.

After what seemed like a very long 40 minutes, during which we regularly peered through the glass window of the oven like two children in a sweet shop, we lifted them out steaming and golden. It might sound like I'm making a big deal out of two pasties but Ivor Dewdney's pasties had only been the stuff of legends in our house until now.
Looks good enough to eat!


Thin crisp pastry and a succulent filling -
just what a good pasty should be like!
So we served them up and what can I say? They certainly lived up to their reputation! I've had many a pasty with thick, dry pastry and with lots of air and little filling inside but this most definitely wasn't one of them. The pastry was wafer thin and very crisp on the top and bottom and the generous filling was simple; there was no carrot, no onion, no anything else - just tender pieces of potato and finely ground beef that had been liberally seasoned which gave it a delicious peppery edge.

The best thing is, as I ordered 8 I've still got 6 left to go! 

Thursday 20 February 2014

Nice and Spicy!

Grinding your own spices is really easy with a pestle
and mortar
I decided to clean out my spice cupboard the other day which was bulging at the seams with a wide array of aromatic seeds, powders, leaves, pastes and sauces. When I eventually emptied it I counted 53 different varieties in total. Is it just me or does that seem like a lot? Wikipedia lists nearly 200 different culinary herbs and spices so maybe not!

I wasn't brought up on spicy food - quite the opposite - but I now use herbs and spices almost every day and can't imagine cooking without them. When I was little I remember lifting our esteemed jar of mixed spice from the back of the cupboard every year as part of the family ritual that was making our Be-Ro Christmas cake. That, plus an ancient jar of ground nutmeg, which was used exclusively for sprinkling over the top of custard tarts, was it on the spice front as far as I can recall. Food must have been dull in those days!


Buying spices in bulk makes sense -
as long as you'll use them!
I recently started buying the spices I use more often in 400g bags from Asian stores as they are cheaper than buying the small jars of spices available in my local supermarket. For example a 400g bag of Ground Cumin cost me £2.25 (£0.06 per 10g). When I compare this to some of the prices the supermarkets are charging for their own brand spices I was shocked that the average price was £0.22 per 10g - when I looked at the branded spices, such as Schwartz and Bart, the difference was even higher! Only Asda came close to the Asian supermarket price at £0.12 per 10g for a 41g jar which is a good price and Asda also stocks 400g bags at £2.36 so almost matching my price!

So if you're using the same spices on a regular basis it definitely makes economic sense to buy in bulk. Most spices keep really fresh for ages if they're stored in airtight jars - I've got some lovely nice glass jars that I use - but it isn't necessary to go to the expense of buying jars. Old jam or pickle jars can be used just as well but they need to be thoroughly washed before putting the spices in. Pickle flavoured cinnamon is not a good idea!

So 53 different variety's of herbs and spices in my store cupboard and here they are. It would be nice to hear if anyone has more!
A (very) small selection of spices from my store cupboard!
Bay leaves, Black Mustard Seeds, Capers, Cardamon, Cayenne Pepper, Chinese Five Spice, Cinnamon Sticks, Coriander Leaf, Coriander Seed, Cumin Seed, Curry Leaves, Dill, Dried Chillis, Fennel Seed, Fenugreek Seeds, Garam Masala, Ground Allspice, Ground Black Pepper, Ground Cinnamon, Ground Coriander, Ground Cumin, Ground Ginger, Ground Mixed Spice, Ground Nutmeg, Harissa Paste, Herbes de Provence, Hot Chilli Powder, Juniper Berries, Kaffir Lime Leaves, Lemon Grass, Mace, Marjoram, Medium Curry Powder, Mint, Oregano, Paprika, Parsley, Ras El Hanout, Rosemary, Saffron, Sage, Smoked Paprika, Star Anise, Tamarind Paste, Tabasco Sauce, Tarragon, Thyme, Turmeric, Vanilla Pods, Whole Black Peppercorns, Whole Cloves, Whole Nutmeg and Yellow Mustard Seeds.
These airtight jars keep my spices really fresh.


Cumin Seeds, Ground Coriander, Black Peppercorns,
Paprika and Cinnamon

Tuesday 18 February 2014

Chicken in a Parcel with Soy, Ginger and Noodles


This dish puts in a regular appearance in our house for dinner during the week. It's an unbelievably quick and easy recipe, totally delicious and is bursting with oriental flavours! It involves cooking a chicken breast in a foil parcel in the oven, to which I add ginger, soy sauce and a spring onion. I love it so much I don't experiment with it at all but I'm sure it would work well with with a nice bit of Thai curry paste a drop of fish sauce and some coconut milk mixed together in place of the soy sauce.

The noodles are cooked with spring onions, soy, coriander and sesame oil - the combination is really delicious. I always try to use the reduced salt variety of soy sauce - it has the same great taste but as it's lower in salt it's much better for you.

My daughter cooks this chicken a lot at Uni as it's so easy and has it simply with plain boiled rice - there is plenty of sauce when it's cooked to give the rice a nice flavour but I think the noodles complement the chicken perfectly!

This recipe serves 2


Ingredients

2 Chicken Breasts
400g packet of ready-cooked noodles or 2 (or 3 if you're hungry) nests of dried medium egg noodles
Bunch of spring onions
Half a small pack of fresh coriander 
5 tbsp of dark soy sauce 
Thumb size piece of ginger
1 tbsp sunflower oil 
1 tsp sesame oil

Method

1. Pre-heat the oven to 200°C/ 180°C fan assisted oven / Gas Mark 6.

2. Cut two pieces of aluminium foil large enough to enable a chicken breast to be completely sealed in each. Place a chicken breast on each piece of foil and turn the edges up so that when the liquid is added it stays in the middle with the chicken and doesn't run out.


3. Slice half the ginger very thinly and place on the top of the chicken breasts - there is no need to peel it. Cut 2 of the spring onions into 3 or 4 pieces and lie these across the chicken breasts over the ginger.

4. Add 2 tbsps of soy sauce to each chicken breast.

5. Carefully seal the chicken breasts tightly in the foil so that the liquid cannot escape during cooking and place them in a shallow baking tin. Cook in the oven for 25-30 minutes until the chicken is thoroughly cooked through.

6. While the chicken is cooking prepare the ingredients for the noodles. Slice the remaining spring onions in large slices. Peel and chop the remaining ginger into small, thin strips. Chop the coriander finely.

6. If using dried egg noodles, place them in simmering water and cook according to the instructions on the packet and drain when cooked.

7. About 5 minutes before the chicken is ready heat the sunflower oil over a medium heat in a frying pan or wok and add the spring onion and ginger. Fry gently to avoid burning the onions.

8. When the spring onions have softened slightly add the noodles and turn in the frying pan or wok to warm the noodles and ensure they are coated in the oil. This will only take 3-4 minutes.

9. Add the remaining 1 tbsp soy sauce to the noodles along with the coriander and sesame oil and continue to turn them to evenly disperse them through the noodles.

10. When the chicken is ready, remove from the oven and  serve with the noodles. The chicken can be served still in the foil straight onto plates but I prefer to remove the chicken and pour the sauce over.

11. Remember to remove the ginger from the top of the chicken before you eat it - unless you like the strong tangy taste of lightly cooked ginger that is!

12. Enjoy!

Monday 17 February 2014

Lunch courtesy of Tesco Clubcard

At a loose end for lunch this Sunday, I decided to exchange some of our Tesco Clubcard vouchers for restaurant vouchers. I love a bargain and I was impressed at the level by which I could boost the value of my vouchers so I exchanged £10 in vouchers and got £40 of Cafe Rouge meal tokens in return - not a bad deal at all! 

After a lovely long stroll along the gorgeous quayside in Newcastle, we arrived at Cafe Rouge on Grey Street, our tummies rumbling. When I walked in the first thing that struck me is that the restaurant has a nice fresh and updated decor in subtle tones of grey and blue - not the usual red and gold theme of Cafe Rouge.
Fresh and updated interior

We were shown to our seats and ordered some drinks then, after browsing the menu, ordered our food. 

Our appetizers arrived in good time - we opted for Batons (£4.95), four sticks of bread served with garlic mayonnaise and melted garlic butter plus a Mediterranean 
olive selection (£3.25) which was quite a nice sharing appetizer for two to start our meal - the garlic butter was to die for!

Then our mains arrived - I had chosen that French classic, Boeuf Bourguignon (£14.95) and hubby had opted for the Burger de Bourgogne (£12.50 including 50p donation to Sport Relief). 

My dish was fairly substantial, the beef was really tender with a tasty red wine gravy and the mashed potato it was served with was delicious. There were a few baby onions in the gravy and I would have liked more but overall it was a nice satisfying main course.
Boeuf Bourguignon

My husband was pleased with his burger which was flavoured with blue cheese and bacon and was nicely served with a portion of fries and a tomatoey, peppery salsa.
Burger Bourgogne with fries and salsa

He's a real lightweight so couldn't fit in desert  and ordered an espresso (£2.15) to finish. I, being a complete trooper when it comes to deserts, ordered the Fondant Chocolate (£5.95). It had a rich dark chocolatey flavour and had a nice squidgy centre topped with vanilla ice cream. Although I expected the Fondant to be a little hotter than it was it was delicious. I only realised afterwards that it should have been served with a praline hazelnut tuile, which as you can see from my picture was missing!

At the end of the meal our bill came out at £54.60 in total but with our vouchers we only paid £14.60! What's not to like?

Overall verdict: This is not French home-cooked food but it was tasty and satisfying and to be honest I've eaten a lot worse (and paid a lot more) in Paris! However, taking into account the value for money offered via Tesco Clubcard I'd have to give it 5 stars!!

Fondant Chocolat sans praline hazelnut tuile

Saturday 15 February 2014

Pasties by Post

In our house the words ‘Cornish Pasty’ can’t get mentioned without my hubby waxing lyrical about the most yummy pasties he’s ever had which he got every year when he went on his annual summer holidays to Devon.

I know that pasties from Devon can no longer be called ‘Cornish’ pasties but my husband’s memories go back to when he was a child in the mid ‘70s when anything that constituted a meat and potato filled pastry, even if it was made in Wallsend, was naturally called a Cornish pasty.

Nevertheless, his memories of mouth watering Cornish pasties were from a shop called Ivor Dewdney’s in Plymouth, in Devon!  He’s told us the tale a hundred times of people queuing down the street outside the shop and how, when you finally reached the front of the queue and got your hands on one, the pasty was so hot you could hardly hold it never mind eat it!

Out of curiosity, I decided I’d look old Ivor up to see if the shop was still there and if so, if there was a chance I could get my hands on of some of those legendary pasties so I could take my husband’s stomach on a trip down memory lane.

Lo and behold! I found their website confirming that they’re still in business and thriving with the website claiming that they are at the leading edge of pasty production. Very impressive! And when I spotted that they offer a mail order service called ‘Pasties by Post’ that covers the most of the UK I just couldn’t resist.

Unusually, there is no automatic online ordering service, all orders have to be submitted on one of their order forms which can be filled in online then printed off and sent by post with a cheque. It then takes at least 7 days to process the order and despatch them to you.

I’ve decided to order a box of 8 large traditional pasties (veggie options are also available) at £27.00 including delivery so I’ve filled in my order form, written my cheque and I’m about to take myself off to the post box to post my order now and can’t wait for my pasties to arrive soon. I hope they are worth the wait and will live up to their reputation!
My pasty order ready to post


Friday 14 February 2014

A quick midweek meal to banish the winter blues

Poor old Blighty has been getting a good battering from the weather over the past few weeks and it looks like there’s still more to come! We’ve been really lucky up here in Northumberland having largely escaped any flooding so far. I don’t want to speak too soon though – our annual deluge of snow is probably just around the corner.

I've been sustaining myself through the cold dark nights of winter with plenty of rich and hearty home-cooked food (and a reliable central heating system!) but I'm now finding myself hankering for some lighter fresher summer tastes. Brought on by all those holiday brochures I've been flicking through I suspect!

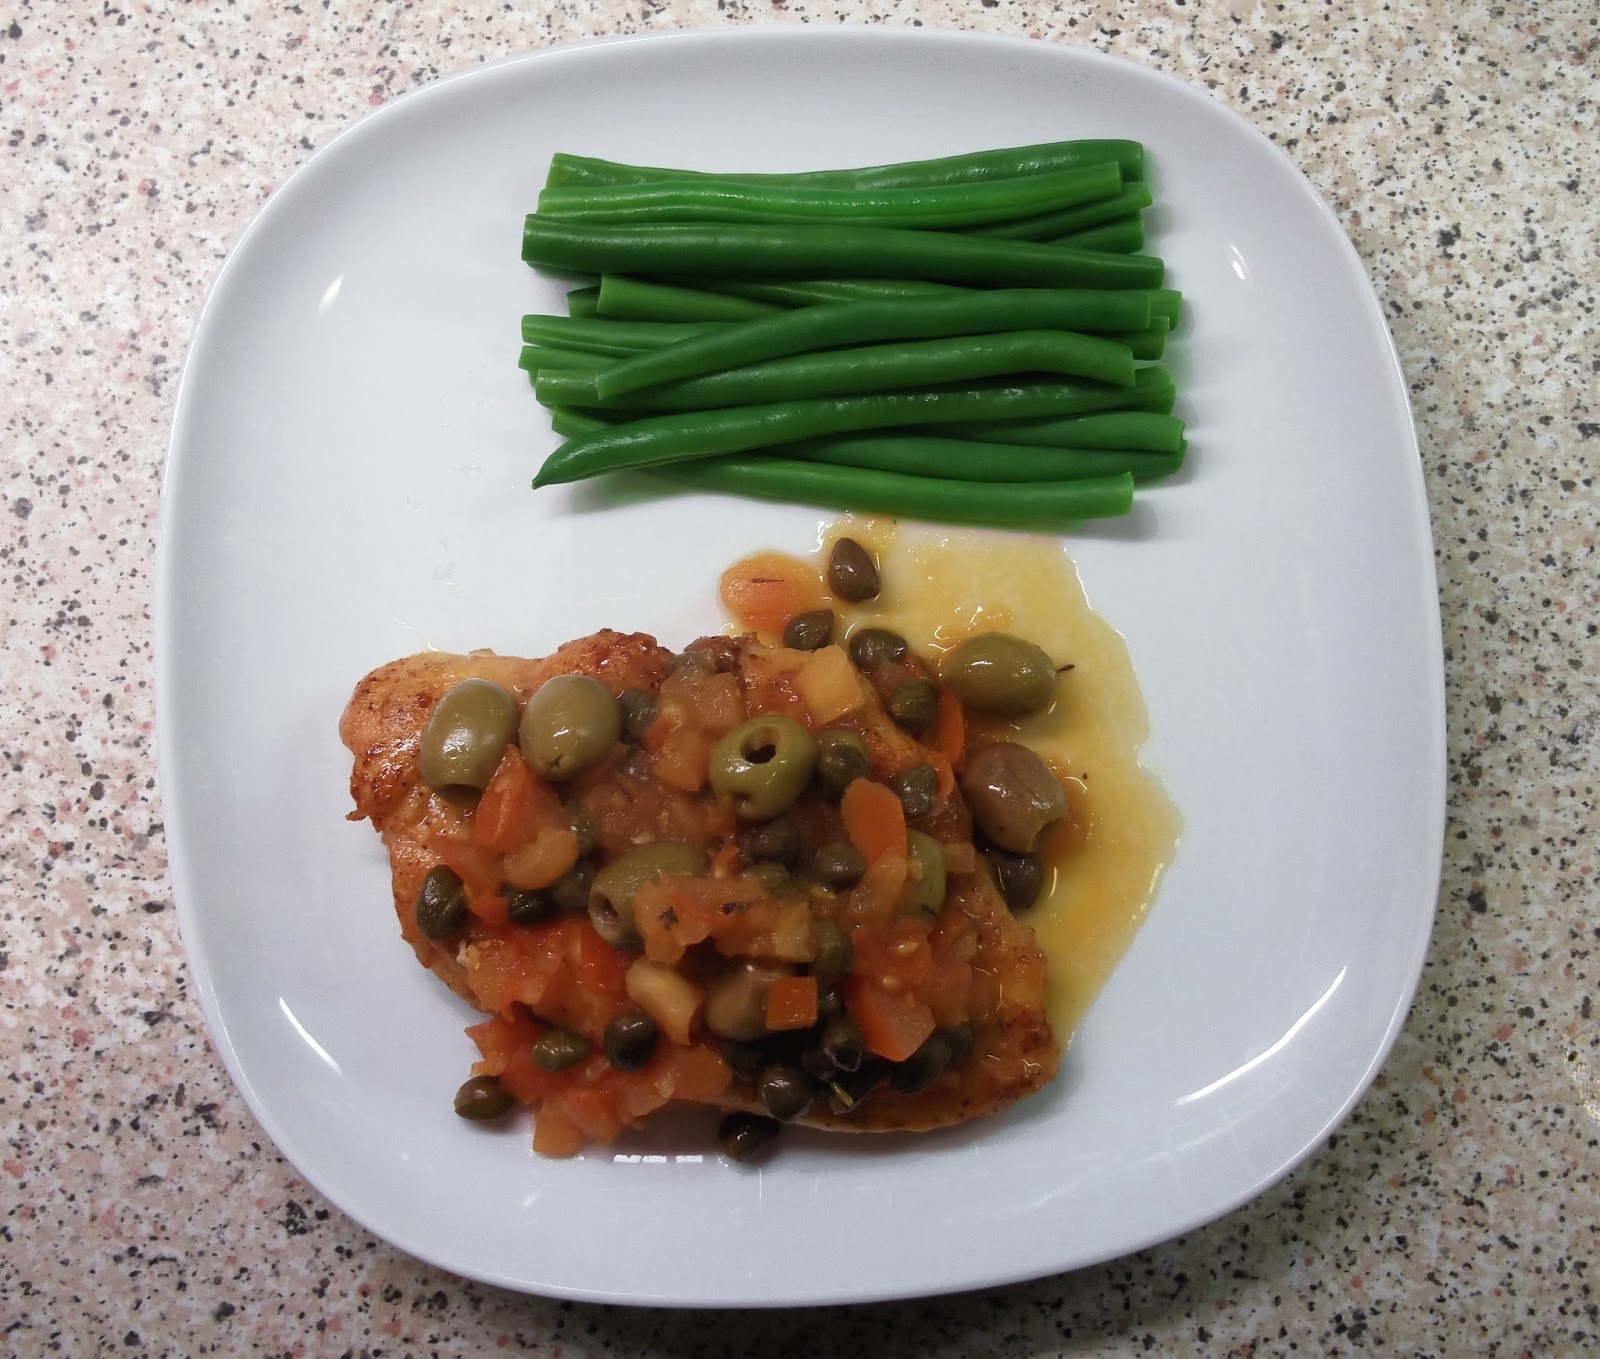
A plate of summer in the depths of winter
Out of season ingredients available at this time of year seem to have virtually circumnavigated the globe before finding their way into my local supermarket  and I usually avoid them when I can. So I was over the moon when I found this recipe on the BBC Good Food site which uses mainly store cupboard ingredients to create an effortless Provençal style sauce for chicken although I suspect it would complement fish just as well. Even better - I discovered, when I made it, that it can be cooked up from scratch in around 20 minutes so it’s perfect for when I’ve come in late and just want to batten down the hatches, turn the heating up, eat something nice and dream of summer.

I must point out that I did serve it with fine green beans from Morocco as it seemed the ideal accompaniment (and it was) so on this occasion I make no apology!

I have tweaked the original recipe very slightly to add a bit of heat! 

Notes: This recipe serves 1 but just increase the ingredients accordingly to serve more. Also, nice juicy ripe tomatoes are hard to come by in February but the sauce won't suffer by using the less tasty varieties available at the minute. The recipe calls for a splash of wine or water - wine definitely gives the sauce extra depth of flavour. Finally I used half a sachet (around 35g) of Crespo green olives with herbs and garlic - because they are already marinated they make the sauce extra tasty.

Chicken Breast with Tomatoes, Olives and Capers

Ingredients

1 Boneless, skinless chicken breast
a little seasoned flour mixed with half tsp chilli powder
1 tbsp olive oil
1 large (ripe if available) tomato, chopped
2 tbsp capers
handful olives
splash white wine (or water)

Method

  1. 1. Bash the chicken with a rolling pin to flatten, then lightly coat in the seasoned flour mixed with chilli powder. Heat the oil in a pan, add the chicken and cook for 6-7 mins, depending upon the size, on each side until crisp, browned and thoroughly cooked through. Remove from the pan and keep warm.

  2. 2. Add the tomato, capers, olives and wine to the pan, season to taste, then bring to the boil. Bubble the sauce for 2-3 mins until the tomatoes are starting to break down, then spoon over the chicken and scatter with chopped herbs. 

  3. Recipe from Good Food magazine, October 2009


Related Posts Plugin for WordPress, Blogger...