Sunday 30 March 2014

Thai-style noodle soup without the hard work

Thai noodle soup
It seems that every recipe I find or article I read about chicken noodle soup waxes lyrical about its health benefits and tells me that it's the perfect antidote for kids when they are feeling unwell - but only when it's made with really good homemade chicken stock.

Let's get real here! When my daughter was little both my hubby and I had full time jobs and whenever she was ill it was always a major crisis! Would we toss a coin to decide which of us was going to ring our employer to tell them we would have to work from home that day? Or would we call an understanding family member to ask them if they could help out? Getting in the kitchen to boil up some chicken bones to make stock wasn't at the top of my list of priorities!  

Even though I've got more time on my hands at the minute, and I do agree that you can't beat good homemade stock, I still like to make food that's quick and easy and ready-made stocks are what I reach for when I don't have the time or the inclination (or a chicken carcass lying around) to make stock from scratch.

This Thai style chicken noodle soup, which is adapted from a recipe by the queen of concentrates - Nigella Lawson, satisfies my need for simplicity and taste. It's packed full of Asian flavours and it's delicious made with a cube or concentrate and, for non meat eaters, I think even vegetable stock could work.

Notes: The original recipe suggests adding some shredded chicken but I didn't add any to my soup and it was still gorgeous. I also used some medium egg noodles that I bought ready made in a packet but any kind of noodles could be added to this - if using dried just cook them first before adding to the soup.


Thai-style Noodle Soup

Makes 2-3 large bowls of soup or 3-4 smaller ones
Ingredients:
1 ltr chicken stock
200g ready made noodles / 2 nests of dried noodles prepared according to the packet
200ml coconut milk
2cm piece root ginger, peeled and chopped finely
1 red chilli
1 tbsp fish sauce
1/2 tsp turmeric
1 tsp tamarind paste
juice of 1 lime
1/2 tsp sugar
2 heads pak choi chopped
1 tbsp chopped coriander

Method:
1. Warm the chicken stock in a large saucepan.

2. Add all the ingredients except the pak choi, coriander and noodles - bring to a simmer.

3. Add the pak choi and simmer for 2 minutes.

4. Add the noodles and coriander - ensure the noodles are warmed through and serve.

Wednesday 26 March 2014

Lunch ideas for 1 week using flour tortillas Day 7: Pronto Pizza


Flour tortilla pizza

This is the 7th and last day of my mission to make lunch using a flour tortilla each day for a week and so far I have been completely bowled over by all of the delicious and easy recipes I've tried. So, with only one lonely tortilla left from my pack of 8 I had to decide how to give it the same send off as the other 7 and turn it into an appetising lunch.

I have to be honest and say that, when I first came across the idea of a pizza made out of a flour tortilla, I wasn't completely inspired. After all the tasty food I've had this week this one didn't sound too exciting but I thought I'd give it a go anyway - what's the worst that could happen?

First I mixed a quick tomato sauce from:
1tbsp tomato puree
1tbsp water
1/2 clove of garlic, chopped finely
1/4 tsp dried oregano
a little salt and black pepper


Pizza made from flour tortilla
I put my tortilla pizza on a wire rack before baking to
make sure the base turned crispy.
I then spread the sauce over one side of the flour tortilla and sprinkled some grated cheese on top of that. I added some other toppings (roasted peppers, artichoke hearts and green olives I had leftover in a jar in the fridge) and cooked it on a wire rack in a preheated oven at 200°C/ 400°F/ Gas Mark 6 for around 6 minutes - I wanted a crispy base and didn't think a baking tray would do the trick. After approx 6 minutes the edges of the tortilla had turned brown and the cheese had melted.

I took it out of the oven and cut myself a slice while it was still piping hot - it looked nice but the proof of the pudding (or pizza in this case) would be in the eating. Wow!!! This humble tortilla had been totally transformed into something else that tasted so...so Italian! The tortilla base had turned really crisp and the toppings tasted genuinely like pizza - who would have thought it? This had turned out to be one of the best recipe ideas of the week.

I've also got a feeling that it would work just as well with almost any topping and I'm already thinking of making it again but can't decide whether I should add pesto or pepperoni next time! It would also be a great way of getting kids involved in the kitchen - let them build their own pronto pizza. 

So, had I inadvertently saved the best till last? Thinking back over the past 7 days it's difficult to say as I've had so many brilliant lunches that have exceeded my expectations ten-fold. I will certainly never look at a pack of flour tortillas in the same way ever again.

Wonder what I'll have for lunch tomorrow!

Below are links to all of the other recipe ideas I've tried this week:

Taco salad with lime and coriander vinaigrette

Felafel and hummus wrap

Tortilla Chips with home made guacamole and hummus

Huevos Rancheros

Quesadillas

BLT Wrap

Tuesday 25 March 2014

Lunch ideas for 1 week using flour tortillas Day 6: BLT wrap

It's now onto Day 6 of my quest to make a lunch using a flour tortilla and I plumped for a BLT (bacon, lettuce and tomato) wrap. What could be simpler? But just because it's simple doesn't mean it isn't totally delicious. 

I've bought many a ready-made BLT sandwich that just hasn't hit the spot - I don't think refrigeration does them any good - but freshly made they are fantastic.

Spread a flour tortilla generously with mayonnaise and top with chopped lettuce, sliced tomatoes and crisp bacon then wrap and eat. That's all there is to making a quick, delicious lunch. As you can see from the pictures I was a bit over enthusiastic with mine and filled it so full that I could hardly keep the wrap closed! With a bit less filling it could be wrapped in cling film and taken anywhere as a packed lunch. Please note though that if you plan to do this, it's wise to remove the seeds from the tomatoes first as these can make the wrap soggy and soggy wraps aren't nice!


BLT wrap


Sunday 23 March 2014

Lunch ideas for 1 week using flour tortillas Day 5: Quesadillas

After posting about Huevos Rancheros yesterday and Quesadillas today you could be forgiven for thinking that this is a blog about Mexican food. It isn't. But in my quest to have a flour tortilla lunch every day this week, the temptation to try out Mexican-style recipes is too great to resist. In the UK we have only fairly recently discovered how versatile flour tortillas are but in South America they eaten them for centuries, if not thousands of years, so it's no wonder that they go so well with flavours from that part of the world.

My lunch idea for day 5 is therefore a quesadilla and my version is inspired by Mexico but I couldn't honestly say is authentically Mexican. A quesadilla is a flour tortilla that has been folded in half and filled with some savoury ingredients including cheese to make a kind of toasted sandwich. Apparently  the quesadilla gets its name from from the Spanish word for cheese 'queso' so I guess it goes without saying that cheese is not optional! Mine was filled with cheddar cheese and smoked bacon which happens to be one of my most favourite combinations but, in honour of Mexico I also added a bit of chopped green chilli. 

Quesadillas

I haven't provided a recipe for quesadillas because it's the sort of thing that can be completely adapted to what you fancy, or what you happen to have in at the time, but I have outlined the method below.

Quesadillas

1. Place a flour tortilla on your board and put the filling ingredients onto one half of it. 

2. Fold the other half across the filling. Press it down so it's quite flat and brush both sides with oil.

3. Heat a griddle or frying pan and cook the tortilla on both sides for about 1 minute each side.

4. Remove from the pan, cut in half and serve.

Saturday 22 March 2014

Lunch ideas for 1 week using flour tortillas Day 4: Huevos Rancheros

I'm onto Day 4 of my challenge to come up with a yummy lunch every day this week using flour tortillas and today I tried the exotic-sounding Huevos Rancheros, which translates to the not so exotic sounding Ranch Eggs in English. 


Huevos Rancheros (Ranch Eggs)


This recipe has its roots in Mexico where they eat it (or certainly a version of it) for breakfast. It consists of tomatoes, onion and a bit of chilli piled onto a flour tortilla which is then topped off with a fried egg. Eating chilli for breakfast isn't really my thing but if you think it might be yours then Huevos Rancheros would make a great spicy alternative to a full English once in a while. 

Huevos Rancheros (Ranch Eggs)

Serves 2

Ingredients:
1 medium onion, finely chopped
1 tin chopped tomatoes
1 green chilli, finely chopped
chilli power / chilli sauce to taste
2 eggs
2 flour tortillas
Oil for brushing and frying

Method:
1. Heat the oil in a frying pan and fry the onion for approximately 5 minutes until it is soft, don't allow it to burn.

2. Add the tomatoes and the chilli (plus some chilli powder or chilli sauce for extra heat) and simmer for approximately 10 minutes until the liquid has mostly absorbed and the sauce is fairly thick.

3. Heat a frying pan and brush the tortillas lightly with oil and warm the tortillas gently until they are warmed through (approx 1 minute). They should still be fairly soft. Remove and put aside.

4. In the same pan as the tortillas, heat some oil and fry the eggs.

5. To serve, place the tortillas on plates, top with the tomato sauce and place the fried eggs on top.

Friday 21 March 2014

Lunch ideas for 1 week using flour tortillas. Day 3: Tortilla Chips with home made guacamole and hummus

Lunch had to be quick yesterday as I was so busy out and about on general errands for most of the day - the reason why this post is a little late! I also needed something fairly substantial as we were off out in the evening and so wouldn't be eating until we got back. This lunch, that was ready in less than 15 minutes from start to finish, was just what I needed.

My tortilla chips took only 8 minutes to cook and during that time I made up the guacamole which was simple and quick. As I had some hummus in the fridge that was leftover from my felafel and hummus wrap the day before, I decided to have some of that too and ended up with a really speedy feast! 

I used 2 flour tortillas which is quite a lot for 1 person, bearing in mind that the guacamole and hummus is quite filling too but I managed to struggle through!


Tortilla Chips with home made guacamole and hummus

Make as many tortilla chips as you like from a pack of flour tortillas. Just cut each tortilla into 6-8 pieces, brush one side with a little oil and sprinkle with salt, pepper and chilli powder. Place them in a pre-heated oven at 180°C / Gas Mark 4 for 8 minutes. Take care not to burn as once they start to go they burn really quickly and it will completely ruin the taste.

To make the hummus, see the recipe from my earlier post.

Home made Guacamole - serves 1 -2

Ingredients:
Juice of 1/2 lime
1/2 red chilli
Small bunch of coriander
1 small tomato
1 ripe avocado
salt and pepper

Method:
1. Put all the ingredients, except the avocado into a food processor or blender and chop finely.

2. Peel, de-stone and then mash the avocado.

3. Mix the coriander / lime mix into the avocado.

That's all there is to it!

Wednesday 19 March 2014

Lunch ideas for 1 week using flour tortillas. Day 2: Felafel and Hummus Wrap

So, it's Day 2 of my attempt to do something different for lunch each day this week with my pack of flour tortillas and today I opted for a felafel and hummus wrap. This one was a no brainer for me because I love felafel and I love hummus (especially home made - see below) and, as both ingredients are easily obtainable ready-made this can be made in a jiffy. It's delicious topped with a little chilli sauce and with a bit of salad thrown in for good measure!


I do like to make my own hummus though as it's so quick and easy and, even though it's fine to buy it ready-made, I think the fresh taste of home made is even better. This recipe makes enough to generously fill a pack of 8 flour tortillas if it has to. If you've got lots left over, then keep it in the fridge for the next day to have with some crispy tortilla chips (I'm going to try making some tomorrow). The hummus will keep fresh for up to 3 days in the fridge but it's so yummy I'd be surprised if it lasts that long!

Just a note about tahini, which is one of the essential ingredients of hummus. Tahini is sesame seed paste which can usually be found in large supermarkets. However I went around mine three times looking for it and couldn't find it so I assume they mustn't stock it there! I did find it in Holland and Barrett though.


Home Made Hummus

Ingredients:
1 400g can of chick peas (drain the chick peas but reserve some of the liquid for later)
1 clove of garlic
2tbsp tahini
Juice of 1 lemon
1/4 tsp paprika
1/4 tsp cumin
100ml olive oil
Salt and Pepper

Method:
1. Put all the ingredients except the olive oil into a food processer and chop it to a thick paste. Don't worry if there are still lumps at this stage.

2. With the food processor running, pour the olive oil slowly into the mix. The paste should become softer with the oil and turn fairly smooth.

3. If the paste is still too thick, add some of the reserved liquid from the chick peas but not too much, the hummus should be thick and not runny.

The hummus can be spread onto tortillas, as a sandwich filling or as a dip with carrot sticks, bread sticks etc.

Tuesday 18 March 2014

Lunch ideas for 1 week using flour tortillas. Day 1: Taco Salad with Lime and Coriander Vinaigrette

I remember eating flour tortillas for the first time many moons ago. My hubby and I had decided to try our first Mexican meal and we ordered fajitas because they sounded so nice on the menu. When they arrived we didn't know what to do with them and had to ask the waitress for advice! Times have changed and as the appetite for Mexican style food has increased in Britain, wraps are now available everywhere with all kinds of fillings.

I bought a pack of flour tortillas this week and set myself the challenge to make a tasty lunch every day using these chewy flatbreads so here I go. 


Bacon and Cheese Taco Salad with Lime and Coriander Vinaigrette

This involves baking a flour tortilla in the oven to create a crispy tortilla bowl then filling it with some nice salad ingredients. These edible bowls can be filled with all kinds of delicious things - I'm going to try one with Chilli next! Don't miss out the Lime and Coriander Vinaigrette which gives the salad a lovely tangy zingy flavour. Very tasty!!


Serves 1

Ingredients:
1 flour tortilla
a little oil for brushing
3 rashers streaky bacon, cooked until crisp and chopped
grated cheddar cheese for sprinkling
salad ingredients - lettuce, tomato, cucumber, red pepper, avocado (whatever you like)
1/2 red chilli, finely chopped
1tbsp olive oil
juice of 1 lime
1tsp cider vinager
1tbsp finely chopped coriander
salt and pepper

Method:
1. First make the tortilla bowl by brushing an ovenproof bowl, large enough to fit in the tortilla with oil. Place the tortilla carefully inside the bowl, shaping and folding where necessary so the tortilla takes the shape of the bottom of the bowl.

2. Place it in a pre-heated oven 180°C / Gas Mark 4 for 10 minutes. After 10 minutes, remove the tortilla from the bowl (it should be nice and firm) and place it directly on the shelf of the oven for a further 2 minutes. This will help to make the whole tortilla really crisp. Be careful not to overdo it and remove the tortilla earlier if it starts to burn.

3. Chop all the salad ingredients and place them in the tortilla bowl along with the chopped chilli.

4. Mix together the olive oil, lime juice, vinegar, chopped coriander, salt and pepper until well blended and pour over the salad.

5. Top the salad with the chopped bacon and grated cheese. Serve and enjoy!

Monday 17 March 2014

A lovely Scottish weekend

What a lovely weekend I've just had! I spent it in a tiny little place called the Isle of Whithorn (no longer an island) in Dumfries and Galloway in South West Scotland. I count myself really lucky to live in Northumberland - Scotland is so close that it's just a short hop across the border to enjoy a bit of Scottish hospitality now and then. The Isle is a beautiful unspoilt harbour village with some spectacular views of the rugged coastline, which in great Scottish tradition, is peppered with the odd ruined castle or chapel. It's the ideal spot for a beautiful, if windy, clifftop walk.


Isle of Whithorn


For me, the perfect end to any long walk is a stop-off at the local pub for some refreshment and to rest my tired legs and the Isle of Whithorn's only pub/hotel/restaurant is The Steampacket Inn. It's got a great spot right on the harbour and, as well as a wide selection of real ales, wines and soft drinks, it serves lunches and dinner so it was the obvious place for us to eat on Saturday evening. 
A view across the harbour

When we arrived, the lounge and restaurant were both very busy with what seemed to be a mix of both tourists and locals (a good sign) and, as we hadn't made a reservation, we wondered whether a table would be available. We were lucky this time but as this is the only eatery in the village, a reservation would have been a good idea! 

The dinner menu offered a range of typical pub food options including fish and chips, Aberdeen Angus burger and chicken curry and there was also a specials menu which included venison sausages and a choice of locally landed fish. Deciding to skip starters we went straight for mains and we were glad we had! My hubby, who had ordered fish and chips, was served the largest fried fillet of cod we had ever seen! 

I felt that I should have some of the local fish - we were right next to the harbour after all so it seemed like a no-brainer but I was too tempted by the venison sausages and mash instead. This was a much more manageable portion but substantial nonetheless with 3 sausages and a nice dollop of tasty mash. The food was good quality, homemade and very reasonably priced at £10.95 each for our main courses. 


Venison Sausages and Mash

One of the biggest fried fish fillets I've seen!
To accompany our meals my hubby chose one of the wide selection of real ales on offer from the Kelburn Brewery in Glasgow and I had a glass of one of the red wines available - I'm not a beer drinker so was pleased to see a good choice of red and white wines with a 'Wine of the Month' displayed on a blackboard behind the bar.

I was able to squeeze in a pud afterwards and the menu offered a small selection of deserts, cheese and biscuits and a choice of local ice cream from the Galloway Creamery. I went for Sticky Toffee Pudding with custard (only £3.95) - again it was a very large portion and very good - and I managed to eat the lot!


Sticky Toffee Pudding with custard
We left the Steampacket Inn feeling that the food had been hearty, tasty and excellent value for money. Being the only hostelry for miles around, and therefore having a captive audience, there is the opportunity to offer expensive, substandard food but that is certainly not the case here. 

Friday 14 March 2014

Elephant Ears - perfect for nibbling!


I love the English name for these little pastries - Elephant Ears - and looking at the shape of them that's just what they remind me of. These crispy treats originate from France and are called Palmiers in French which is much more elegant sounding, don't you think?

Whatever you prefer to call them (and I prefer Elephant Ears), these light morsels melt in the mouth and I love to have them as a sweet treat with a cup of tea, coffee or chocolate, but they are equally as good turned into a savoury nibble to have with a pre-dinner G&T or cocktail. 

They are made from puff pastry which is rolled, flavoured, shaped and baked until well risen and crisp but don't be put off by the mention of puff pastry - a pack of ready made (even ready rolled) puff pastry is perfect and makes for a speedy solution when you need a nibble in a hurry!

Today I've split a pack of ready made pastry in half and made two kinds of Elephant Ears - some simple sweet sugary ones alongside some cheesy parmesan ones so I've got my afternoon cuppa and evening snacks sorted in one go!

It's worth experimenting with different flavours too. Next time I'm going to try pesto and almond paste - not together of course!


Sweet and Savoury Elephant Ears (Palmiers)

The ingredients below  will make approximately 15  sweet and 15 savoury elephant ears.

Ingredients
1 500g block of ready made puff pastry
4tbsp sugar (demerara or white granular is best)
4tbsp Parmesan Cheese
1tsp dried oregano

Method

Please note that this method is for sweet elephant ears, to make the savoury ones, simply replace the sugar with cheese and oregano.

1. Cut the block of pastry in half.

2. Scatter your work surface with half the sugar. Place the pastry on top of the sugar and roll it out thinly - you'll need it to be about 30mm thick and measuring approximately 30cm x 20cm but don't worry if it's not precise. Make sure that as you roll you turn the pastry to get the underside entirely coated with the sugar - it also needs to be embedded in the pastry which should happen as you roll it out.


After Stage 3 the pastry should look like this with the sugar
embedded on both sides of the pastry
3. Sprinkle the remaining sugar on the surface of the pastry and press it down with a rolling pin so it is embedded.

4. Working from the longest edge, start to roll the pastry, a bit like a Swiss roll towards the centre, but stop when half of the pastry has been rolled. Do the same on the opposite edge of the pastry. The pastry should now be fully rolled from both edges.


I have started to roll one of the edges of the pastry - this is flavoured
with cheese and oregano.
5. Gently squeeze the pastry to hold it all together then wrap tightly in cling-film and place in the fridge for at least 30 minutes - this will help the pastry to stay in shape.


When the pastry has been rolled from both sides it should look
like this.
6. Remove the pastry from the cling-film and cut it into slices across the roll approximately 1cm thick and place them on a tray covered with greaseproof paper or baking parchment. Make sure they are well spaced out as they will rise during baking.
Ready to pop in the oven.

7. Push the pastry shapes down slightly with the heel of your hand to flatten them but not too much.

8. Bake in a pre-heated oven at 180°C / 350°F / Gas Mark 4 for 12-15 minutes until puffed and golden. Remove them from the oven and place immediately on a cooling rack to prevent the pastries from sticking to the paper

Wednesday 12 March 2014

Easy Peasy Prawn Thai Red Curry

Easy Peasy Prawn Thai Red Curry

I've got an eclectic mix of meals on the menu this week due to the fact that our freezer desperately needs a defrost and, as I hate waste, I've made it my mission to cook as many of its contents as I possibly can before I have to switch it off. 

So after planning some interesting meals that uses up most of my frozen food, I'm left wondering what delectable dish I can create with what's leftover - half a bag of spinach, a few ice-encrusted carrots, a dozen hash browns and a small lump of uncooked shortcrust pastry. Answers on a postcard please!

I did find one item tucked away in there that I had forgotten about - a nice bag of juicy prawns. I therefore had to make a difficult choice - would it be prawn cocktail or prawn curry? I decided on prawn curry as I hadn't made it for ages. I've got a recipe that's full of Thai flavours but is unbelievably quick and easy - there's no grinding of spices and very little chopping, and, because prawns don't need to cook for long the whole dish can be whipped up in a matter of minutes. I usually serve it with rice and, honestly, the rice takes longer to cook than the curry itself.

Notes: Any type of prawn is good in this - a simple bag of defrosted cooked prawns works well but if you want to splash out on fresh king or tiger prawns they will be amazing. I used a mix of the frozen prawns from my freezer plus a small tray of king prawns I bought from the supermarket.

This recipe serves 3 - 4


Prawn Thai Red Curry

Ingredients:
1tbsp vegetable oil
Bunch of spring onions (trimmed and chopped)
2cm piece of fresh ginger - finely grated
400ml can of coconut milk
2tbsp red curry paste from a jar
1tbsp fish sauce
500g cooked peeled prawns
1tbsp chopped coriander

Method:
1. Heat the vegetable oil in a frying pan and fry the spring onions until soft taking care not to burn them.

2. Add the grated ginger, coconut milk, red curry paste and fish sauce. Heat the sauce through to almost boiling.

3. Add the prawns and cook very gently for about 5 minutes until the prawns are warmed through. Stir in the chopped coriander.

4. Serve with plain boiled long grain, basmati or jasmine rice.

This recipe has been inspired by a recipe in a book entitled 'What's Cooking? Thai' published by Paragon.

Monday 10 March 2014

Warm up a chilly Spring night with a satisfying bowl of Minestrone

Minestrone Soup

It's really starting to feel like Spring has sprung up here in Northumberland! The past few days have been quite warm and pleasant and my hubby and I enjoyed a couple of nice long walks at the weekend, making the most of the mild weather. 

One of our walks took us along (and just off) the South Tyne Valley Trail which meanders through some beautiful countryside and we caught our first glimpse of some spring lambs - a sure sign that the winter is behind us and summer isn't too far away! Unfortunately, more often than not, Winter has a sting in its tail and I wouldn't be too surprised if we were hit with snow or ice once more - but let's hope not!


Spring Lambs in the Tyne Valley

There's a few dishes that I love to eat at this time of year and I'd like to share one of them - my favourite recipe for Minestrone Soup. It's great at any time but there's something about the flavours (perhaps it's the tomato and basil) that reminds me of the lovely fresh food that we eat in summer and, because I don't usually feel like eating soup in July / August, I think it's just right for now when the days can be warm but the nights are still a bit on the chilly side.


This soup is packed full of goodness and is an excellent way of using up the tasty ham stock left over from making the ham and pease pudding recipe that appeared in an earlier blog. There's quite a bit of chopping involved but once it starts to cook it just requires the occasional stir.

Also, did I forget to say how absolutely delicious it is?

Satisfying Minestrone Soup

Notes: Cabbage is a traditional ingredient in Minestrone but I have suggested some vegetables that I like to use . Feel free to replace the courgette with cabbage instead. Also, if you've got a tin of beans in your cupboard (cannellini, red kidney, haricot or even butter beans) they can be added to the soup about 15 minutes before the end of cooking.
As with any soup, this is best made with good chicken or ham stock but ready made stock works really well too.
Pasta is usually added to Minestrone and I tend to use macaroni, however last time I made it I didn't have any macaroni so I used spaghetti that I snapped into short strands instead and it was great! So I would say any small pasta shape would work in this soup.

Serves 3-4 hearty portions

Ingredients:
50g streaky bacon, de-rinded and finely chopped
1 medium onion, finely chopped
2 celery stalks, finely chopped
3 medium size carrots, finely chopped
Tin of chopped tomatoes
1 clove garlic, crushed
1 very large or 2 small leeks, washed and finely chopped
2 courgettes, finely chopped
25g butter
1 tbsp olive oil
1.5 litres stock (homemade if possible)
1 1/2 tbsp chopped fresh basil or 1/2 tsp dried basil
75g macaroni or other small pasta
1tbsp tomato puree
salt and pepper
grated Parmesan to serve (optional)

Method:
1. Heat the butter and oil in a large saucepan then add the bacon and cook for a minute or two before adding the onions, celery, carrots, tomatoes and garlic. Add some salt and pepper then cover and cook over a low heat for 20 minutes, stirring occasionally, allowing the vegetables to soften but not brown.

2. Pour in the stock and add the basil, simmer for approximately 30 minutes.

3. Add the leeks, courgette and macaroni, cover and simmer fo a further 30 minutes.

3. Stir in the tomato puree and cook for another 10 minutes.

4. Serve and sprinkle with the Parmesan cheese.

My inspiration for this recipe came from 'Minestrone with Macaroni' from Delia Smith's Complete Cookery Course. 

Friday 7 March 2014

Friday Night is Comforting Curry Night


 It's Friday at last (yay!) and in our house Friday night is very often curry night. I don't know what it is about curry but it always seems to be the ideal way to round off a long, busy and stressful week. It's probably because I find it really comforting and the rich, thick, spiciness of it seems to have a calming effect on me! 

We've got some really good Indian restaurants and takeaways in Hexham so if I'm not in the mood for cooking there's plenty of options but I do think it's nice when the two of us decamp to the kitchen, turn on some music and enjoy a bit of chopping, frying and stirring while sipping a glass of wine or two (it is Friday after all).

I've got a long list of curry recipes that I've tried - some good, some not so good, some easy, some ridiculously complicated but I thought I'd share the recipe that has stuck with us over the years and makes a regular appearance on our table. This fairly easy recipe is from Jamie Oliver and produces a lovely rich and creamy curry without too much heat, although more chilli could be added by those who like their curry hotter. I am sure that curry aficionados would argue that it's not a truly authentic curry but it's really delicious and uses some nice ingredients. I love to eat it just with Nan Bread but rice is delicious too and if you're extra hungry you could have it with both!

Notes: The original recipe calls for a handful of curry leaves but they are really expensive and I don't think they add too much to the finished dish so I've decided to make them optional - if you happen to have some, put them in at the same time as the chillies and ginger.
The recipe below is for a chicken version. For a vegetarian version add 800g of mixed vegetables (any kind really) at the start when you add the onions.
I've found that thick and creamy coconut milk produces the best results but if you want to cut down on the amount of fat in the dish, a lighter version will work but the sauce may be a bit thinner.

Serves 4

Ingredients:

6 tbsp vegetable oil
2 tsp mustard seeds
1 tsp fenugreek seeds
2 fresh green chillies deseeded and thinly sliced
2 thumb-sizes pieces of ginger, peeled and coarsley grated
handful of curry leaves (optional)
3 onions
1/2 tsp chilli powder
1 tsp turmeric
6 tomatoes, chopped
1 x 400ml can coconut milk
salt
4 chicken breasts cut into strips
1 tbsp coriander seeds, crushed

Method:

1. Heat 5 tbsp of the oil in a pan and when hot add the mustard seeds. Wait for them to pop then add the fenugreek seeds, fresh green chillies, curry leaves (if using) and ginger. Fry, stirring for a few minutes. 
Allow the chillies, ginger, curry leaves and spices to sizzle

2. Peel the onions and chop them then add them to the pan. Continue to cook for 5 minutes until the onion is light brown and soft then add the chilli powder and turmeric.

3. Add the tomatoes to the pan and cook for a couple of minutes then add the coconut milk. Simmer for about 5 minutes until it has the consistency of double cream then season carefully with salt. If the sauce is too thick, add a little water.

4. Meanwhile, heat the remaining 1 tbsp of oil in a separate frying pan and stir-fry the chicken and coriander seeds until lightly coloured then add this to the sauce. 

5. Continue to simmer the chicken and sauce together for 10 minutes, ensuring the chicken is thoroughly cooked through.

The finished curry will have the consistency of double cream

Thursday 6 March 2014

85 Cookery Books and Counting

Twitter and Facebook were buzzing with photos of children off to school dressed as story book characters this morning. Of course -  it's World Book Day! 

I remember doing the same for my daughter when she was at primary school and I suspect that most parents will understand, and have possibly shared, the panic that I felt when I found the inevitable note from school crumpled up in the bottom of her school bag stating that she had to be dressed as a character from her favourite book the next day. The next day? Even Hermione Grainger who wears her Hogwarts uniform most of the time would be a challenge! I could turn a chopstick into a wand easily enough but where would I find a scholar's gown in Hexham at 8pm at night? My daughter didn't, and still doesn't, do things by half!!

Thankfully, but with sadness, those days are behind me now and, although we've still kept a few favourite children's books for posterity, our shelves are now filling up with my collection of cookery books.

Like my large collection of herbs and spices (see my blog Nice and Spicy!) this is another of my obsessions - I had 85 at my last count. Having quelled my appetite by buying books from all those TV series I've watched (Nigella Bites, Nigella Express, Nigellissima...you get my drift?) I have started to scour second hand bookshops for some more unusual books and have found one or two interesting ones.

'English Provincial Cooking' by Elisabeth Ayrton is my most recent acquisition. It was written in 1980 and includes some daunting sounding recipes such as Boiled Calf's Head, Chicken as Lizards and Birds Encased, which counts 6 young pigeons among its ingredients - I don't think I'll be trying that anytime soon!


My most recent acquisition - it makes good reading!

'Maw Broon's But an' Ben Cookbook' is a hodge podge of Scottish themed recipes and amusing yarns all centred on that famous (but fictitious) Scottish family that appears as a comic strip in the Sunday Post every week. Hame-made Sassidges and But an' Ben Clootie Dumpling are the highlights for me.

Maw Broon's But an' Ben Cookbook is set out
like a scrapbook

One of the most bizzare books I've got though is 'The Career Woman's Cookbook' written by Bee Nilson in 1966. It was the title of the book that attracted me to it along with the cover which has an onion, tomato, green pepper and lipstick(!) on it. The book was apparently written 'for the woman who runs both her home and a job outside the home' and 'concentrates on short cuts to good meals'. It transpires that Bee's answer to saving time was to open a tin! Her suggestions include Ways of Serving Canned Macaroni Cheese, Using a Can of Mince, Using Canned Stewed Steak and Ways of Using a Packet Jelly. To be fair not all her recipes use convenience foods but I haven't yet found a single recipe in this book that sounds appetizing enough to try myself!


If you like using tinned food in your cooking you'll love this book!
Seriously though, buying at second hand bookshops and charity shops is a brilliant way to build up a comprehensive collection of cookbooks - they're usually really cheap and they aren't all like the ones I've outlined above - they often have a good selection of recent ones too. And thinking about World Book Day it's also a good way to try out different children's books to find one your kids will actually read without spending a fortune.

I'm always interested to hear about unusual cookbooks and recipes so if you've got some in your collection that you'd like to share please feel free to comment below - there's bound to be some amusing ones out there!

Wednesday 5 March 2014

Good Old Fashioned Ham and Pease Pudding

Ham and Pease Pudding just like I remember
Whatever happened to pease pudding? It was a common sandwich filler and side dish when I was a child growing up in the North East of England and I can remember the days, not so long ago, when no self-respecting buffet table would be without a plate piled high with ham and pease pudding sandwiches! Unfortunately I don't see it around so much these days and I think it may have fallen out of favour as we crave more exotic and sophisticated tastes. I think that's such a shame because it is so delicious to eat, versatile (it can be eaten hot or cold) and economical - 500g of yellow split peas only costs around 50p and that makes a lot of pease pudding!


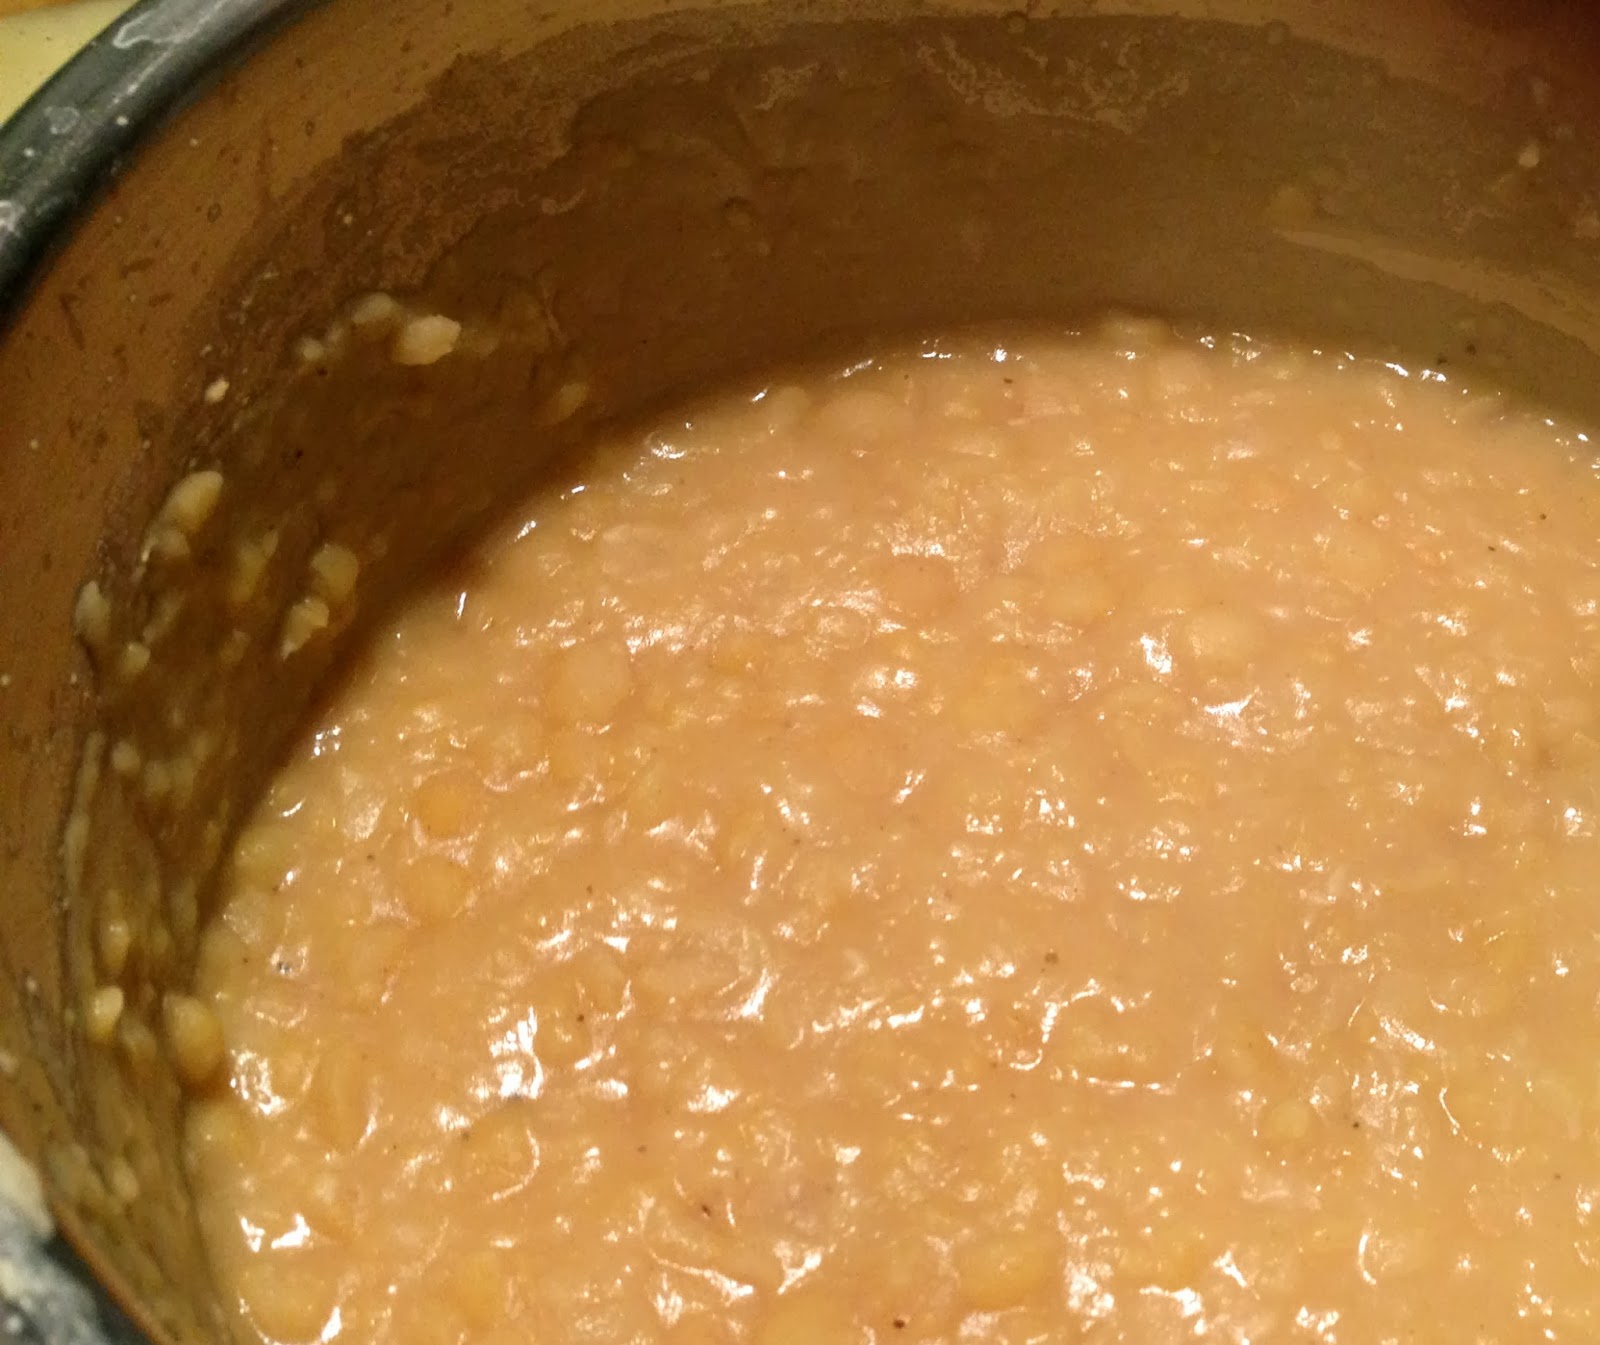
A dish of yummy mushiness!
Pease pudding (in case you don't know) is a savoury thick paste made from yellow split peas which are cooked to a mush with some herbs and spices traditionally in ham stock, alongside the ham, so it absorbs the salty flavour of the meat. It's usually served with ham or gammon because they go so well together and it can be served either as part of a hot dish or cold and can easily be spread on bread - a cold ham and pease pudding sandwich is highly recommended! 

I recently decided to have a go at making my own pease pudding the traditional way - cooked in muslin in the same pot as a gammon joint. It was great fun and really felt like I was doing some good old fashioned home cooking. The recipe below produces a simple pease pudding that tastes just like I remember and it can easily be adapted for vegetarians - the notes section below explains. 

Notes: For a vegetarian version of this recipe, or to make the pease pudding without the ham, simply poach the muslin-filled bag of pureed peas in vegetable stock (or chicken stock for non-vegetarians) for the time specified. 
I used a 1kg gammon joint but for a larger or smaller joint adjust cooking times accordingly.
Ham hock is a cheaper alternative to gammon so for an even more economical meal the gammon can be replaced with ham hock. 
Where muslin isn't at hand (and lets face it how many of us have a piece of muslin lying about in our kitchen?) a clean tea towel works well - I remember my grandma cooking up a dumpling this way. Ensure the tea towel is tied tightly before immersing in the stock as the peas need to stay together and not break down while the pudding cooks. 

Ingredients:

1 unsmoked gammon joint 
1 stick of celery
1 carrot 
1 onion
4 bay leaves
6 whole black peppercorns
300g yellow split peas soaked in cold water for approx 2 hours
1 beaten egg
salt and pepper

Method:

1. Cut the celery and carrot into 2-3 large pieces and the onion in half (there's no need to peel
The gammon is ready for cooking
the onion). Place them in a large saucepan or stock pot along with the gammon joint, 2 of the bay leaves and the peppercorns. Add sufficient cold water to cover the gammon generously.


2. Place the pan on the hob and bring to the boil. Once boiling turn down to a simmer, cover and cook for 1 hour.

3. Meanwhile, drain and rinse the peas and place in a separate saucepan with approximately 700ml of cold water. Add salt, pepper and the remaining 2 bay leaves. 


Don't let the peas dry out - add more water if required
4. Bring the peas to the boil and simmer for approximately half an hour until the peas are soft and most of the water has been absorbed. Ensure that you check the peas regularly and add more water if they are drying out.

5. Once the peas are cooked, remove from the heat and puree the peas using either a hand blender,food processor, potato masher or a sieve. The puree should be fairly smooth but it doesn't matter if there is the odd whole pea left - it will add some texture!

6. Add the beaten egg to the peas and mix well.


The finished pease pudding still in its muslin bag
7. Spoon the split pea puree into a piece of muslin or a tea towel and tie it tight to ensure the peas can't escape during cooking. Place the bundle of pea puree into the saucepan alongside the gammon.

8. Simmer the peas with the gammon for the remaining cooking time (approximately half an hour).

9. When the gammon is thoroughly cooked, remove it and the bundle of peas from the saucepan and leave to rest for a few minutes.

10. When cool enough to handle, remove the peas from the muslin or tea towel and place in a serving bowl. Carve the gammon and enjoy - it's delicious served with a dollop of English mustard!
Related Posts Plugin for WordPress, Blogger...